Friday, December 3, 2010

No Batteries Required: 5 Great Gifts That Get Kids Moving

1. Balls -- Throw them, toss them, catch them, roll them, kick them, bounce them. Children of all ages love balls. They develop gross motor and fine motor skills, as well as hand-eye coordination. A Basketball Hoop, Soccer Goal, or Target Toss make for a value added gift that spans across ages!

2. Jump Ropes -- Simple and inexpensive, this piece of equipment can be taken anywhere. Jumping rope is a cardiovascular activity which also improves strength, balance, agility and coordination. Preschoolers, not ready to jump rope, can walk and balance on a straight or curved rope on the ground or jump over a stationary rope held a few inches off the ground.

3. Hoops -- What goes around comes around! When using hoops, the goal is to keep the hoop moving on your hips as long as possible. The hoop can also be rotated around other parts of the body-- arms, legs, neck-- just for the fun of it. Young children can roll the hoop and run to catch it before it falls flat on the ground. There are even smaller Activity Hoops that some children will feel more comfortable using. The Hula Hoop was inducted into the Toy Hall of Fame in 1999. While still being fun for children to play with, it has taken a turn in even offering health benefits for adult fitness.

4. Trikes & Wheeled Toys -- Experts recommend about 1½ to 2 hours of physical activity for toddlers and preschoolers daily, especially outdoor activities like pedaling a tricycle and using push/pull/ride toys. The tricycle is a great first set of wheels for children younger than 5. Inside or out, time spent wheeling around puts children in the “driver’s seat,” allowing them to explore the limits of their skills in a positive way. Watching a child’s excitement as he or she learns to ride their first trike is thrilling and fun! Plus, tricycles are such a memorable part of childhood.

5. Hopscotch -- Whether you make your own grid with some Sidewalk Chalk or purchase a Hopscotch Play Carpet, the game of hopscotch is a classic children’s game. Start by tossing the marker (typically a stone, coin or bean bag) into the first square. The player then hops through the course, skipping the square with the marker on it. Single squares must be hopped on one foot. Side by side squares are straddle jumped, with the left foot landing in the left square, and the right foot landing in the right square. The idea is to go through the entire course without losing your balance. After you get to the top, you turn and head back down the course picking up the stone or bean bag when you come to it. If you complete the course without falling, stepping on a line, or missing one of the boxes, you throw the marker to the next numbered box and repeat the process. If you don’t complete the course, you must wait your turn and then start in the box where you ended your previous turn. Hopscotch lets kids hop and jump their way to being more physically active while developing balance, coordination and flexibility.

Why not give a gift that keeps on giving? Active gifts will give children endless hours of fun, keep them moving and fit and developing important motor skills.

Friday, October 29, 2010

Trick or Treat Halloween Game

The element of suspense combined with movement makes this a spooktacular active Halloween game. Will you pick a “Treat” or have to do a “Trick?”

Materials needed:
Jack-o-Lantern Bucket or decorated Trick or Treat Bag
Orange construction paper
Pumpkin cookie cutter or stencil shape
Halloween stickers
Pen or markers
Scissors
Halloween music

Before You Begin:
1. Trace and cut pumpkin shapes out of orange construction paper. Have as many pumpkin shapes as the number of children playing plus a few more.
2. On half of the pumpkins place a Halloween sticker on one side of the paper shape and on the other side write the word “Treat.”
3. On the other pumpkin shapes write the word “Trick” on one side and a movement or exercise on the other side. Here are some ideas...
Do 10 jumping jacks
Flap your wings (arms) and fly like a bat
On hands and feet scamper like a spider
Touch your toes 10 times
Float (leap) like a ghost
Move like an elephant
Jump like a frog 10 times
Walk like Frankenstein
Hop on one foot 10 times
Gallop like a horse
Creep (on hands and knees) like a cat
Spin around 5 times
Slither (on your belly) like a snake

Let's Get Started:
1. Have children sit in a circle.
2. Show children all the pumpkin shapes before placing them in the “Jack-o-Lantern Bucket” or “Trick or Treat Bag.”
3. When the music starts, pass around the bucket/bag.
4. When the music stops, the child that is holding the bag removes a pumpkin shape.
5. If the pumpkin shape has a sticker on it, it is a “Treat,” and the child does not have to do anything.
6. If the pumpkin shape is marked “Trick,” the child must perform the movement or exercise written on the paper (standing in the middle of the circle or moving around the outside of the circle of children).
7. The music starts again and the bag/bucket is passed. The game continues until everyone has had a turn.

Furthermore:
1. Let the children help in determining what movements to write on the “Trick” pumpkin shapes. 2. Do not read the “Trick” out loud. Instead, have the children in the circle guess what “Trick” is being performed by the child.

Thursday, October 14, 2010

Hit the Deck! Shipwreck!

Let’s pretend... and get physically active while playing this fun, non-competitive game.

Materials and Set-Up:
Indoor or outdoor space with boundaries using cones or Hop Around Steps.
Tumbling mat(s) placed in center of playing area designated as “the ship.”

Let’s Get Started:
1. Children watch and listen as directions of how to play are demonstrated.
2. The teacher or game leader is designated as the Captain.
3. Commands will be given by the Captain and the children are to react quickly as members of the ship’s crew. (The mats are the ship.)
4. On the command HIT THE DECK all children are to sit cross-legged on the mat.
5. On the command SHIPWRECK all children leave the mat and pretend-swim in the open sea (the space around the mat).
6. On the command LIFEBOATS children leave mat and find a partner. They sit down with legs apart and feet touching. They hold hands across from one another and sing “‘Row, Row, Row Your Boat” as they rock back and forth, pretending to row their lifeboat.
7. On the command SEAGULLS children leave mat and stand in open space with legs apart, arms waving and flapping overhead, making a squawking noise.
8. On the command SCRUB THE DECK children go to mat and get on hands and knees and pretend to clean in a scrubbing action.
9. On the command CAPTAIN’S COMING children stand to attention facing the teacher/game leader and salute.
10. On the command SHARKS children run to the middle of the mat and do a group hug or huddle without pushing or grabbing.

Goals:
1. Physical activity = any bodily movement produced by skeletal muscles that results in energy expenditure.
2. Health-related fitness = components of physical fitness that are related in a positive manner to health and well-being: cardiovascular fitness, muscular strength and endurance, flexibility, and body composition.
3. Gross motor skills = using the large muscles of the arms, legs and trunk.
4. Listening skills = ability to follow verbal directions.
5. Space awareness = knowing where the body can and should move in relationship to other people in the play space.
6. Agility = quick, easy, lively movements.
7. Cooperative play = games and activities that the participants play together rather than against one another.

Furthermore:
1. Introduce the game using only 3-4 commands; add others after children become familiar with the game.
2. Vary the length of time between commands.
3. Try to trick children by repeating a command twice in a row.
4. Let children take turns being Captain and giving commands.
5. Children may devise other commands and actions.
6. A parachute can also be used as the ship, instead of tumbling mats.

Thursday, September 30, 2010

Unplug… And Reconnect with Nature

It’s hard to believe that this week is designated as “Take a Child Outside Week.” The fact that we even need to have an initiative to motivate parents to go outside with their children and connect with nature is beyond comprehension for me!

During my childhood years, there was no better place to be than outside. In fact, our parents didn’t even offer us any other options; they just wanted to know that we were in the “neighborhood.” This could mean the woods near our house, down the street playing in someone’s backyard or at the school playground around the corner. We were always outside even as our parents stayed inside. Our parents didn’t have to “take us outside.” Our parents didn’t buy nor need to steer us away from the HDTV, video games, computers, phones and other technological gadgets that bombard the environment of children today. It seems a bit ironic that it’s the parent’s responsibility to get their children outside when it is they, the parents, who buy all the newest technology and allow (or even encourage) their children to learn how to use it. In Richard Louv’s book, “Last Child in the Woods: Saving Our Children From Nature-Deficit Disorder,” he quotes a fourth-grader as saying, “I like to play indoors better ‘cause that’s where all the electrical outlets are.”

I saw an ad in the paper last week that had the following message, “There is no childhood obesity epidemic. (We just need better role models.)” We need parents to recognize that they are their children’s first teachers and that they are their children’s role models. One in three kids are overweight or obese and electronic media and junk food are partly to blame. And who is buying these pricey video games and high fat and sugar foods? It’s usually not the 4- to 8-year-old child. I feel as responsible adults we need not to be spending money on these items for our young children. Turn off the TV (I think there’s a designated week for that too!), and consider playing a video game or watching a movie a “treat” and not something to be consumed 5-6 hours daily!

What if we open the door and give children the time and opportunities to explore and discover nature on their own? Finding worms and dirt and leaves and sticks and rocks and bugs and whatever the outdoor space has to offer, the natural world is rich in sensory experiences for children. Smell the flowers, listen to the birds, feel the wind on your face, roll in the grass, stomp in the puddles or watch the shapes of clouds in the sky. Even in urban environments, children can experience nature. Provide
magnifying glasses, tweezers , and small shovels for children to explore a small patch of dirt or grass. Even weeds grow in sidewalk cracks, ants can be found there too. Place a thermometer outside and read the temperature. Watch shadows, use binoculars for bird or squirrel watching. You don’t have to be a naturalist to instill in children an awe of the world and a desire to discover and uncover what is around them. You can nurture children’s interest in nature simply by demonstrating your own excitement and curiosity. Let’s go outside! You are a role model!

Friday, September 17, 2010

Drawing Relay

Keeping kids up and active can be a challenge during the school day, but the following activity, courtesy of TeacherQuickSource, is a great way to incorporate movement into a fun, creative arts activity. This is easy to set up can be done indoors or out, which makes it great for any season!

Drawing Relay

Materials Needed:
A large piece of butcher paper or large individual sheets for each team
Crayons or markers
A large area for a group relay activity

Let’s Get Started:

1. Divide the children into 4-5 teams so that there are only 3-4 people on each team.
2. Attach the butcher paper, or individual sheets for each team, to a wall, fence or other barrier.
3. Tell the children that one person from each team is going to go up to the paper and begin drawing a picture.
4. At the end of 30 seconds, the teacher will blow a whistle. At that time, the child will run back and give the crayon to the next person on his team. That person then runs up and continues drawing.
5. This relay should continue until each child has had two turns.
6. Take down the pictures and have the teams discuss what they drew.

Thursday, September 2, 2010

Morning Moving Routines

Get the blood flowin’ and brains growin’ when you begin each day with some physical activity! The start of a new school year is a great time to establish a daily morning routine that gets kids up on their feet and out of their seats. Here are some of my favorite ideas for active starts to the school day:

Super Hero Exercises
With a little imagination and your verbal cues, children will be smiling and moving as they perform each exercise. Count to ten aloud as you do each one with the children.

Superman Stretch: children attempt to keep their balance while up on their tiptoes with arms stretched over their heads. (Imagine: “Superman is flying!”)

Batman Bounce: children jump in place with feet together 10 times as they count aloud to ten. (Imagine: “Batman is jumping into his Batmobile!”)

Robin Run: children run in place as they count to 10 aloud. (Imagine: “Robin is running to catch up with Batman. Wait for me Batman!”)

Spiderman Swivel: children stand with feet are shoulder width apart. Twist from side to side with arms and hands moving across the body. (Imagine: “Spiderman is throwing his web!”)

Wonder Woman Windmills: children stand in with feet shoulder width apart and arms are stretched out to the side. Use the hand of one side of the body to touch the foot on the opposite side. To help children perform this movement say, “Turn, touch toes, and up!” “Up!” means body is in a standing tall position. Repeat instructions several times with children using opposite hands to touch opposite toes. (Imagine: “Wonder Woman is getting her Magic Lasso!”)

The As-If Game
Have the children act out each sentence:
1. Jump in place as if.... you are popcorn popping
2. Walk forward as if... you are walking through glue
3. Jog in place as if... a big, scary bear is chasing you
4. Shake your body as if... you are a wet dog
5. Move your feet on the floor as if... you are ice skating
6. Reach up as if... grabbing balloons out of the air
7. March in place and play the drums as if... you are in a marching band
8. Swim as if... you are being chased by a shark
9. Move your arms as if... you were juggling scarves

Ask the children to create their own “As-If” sentences for the group to act out.

These activities can be great fun for the young children in your classroom or home. Are you an early childhood educator or parent with an idea for an active start of the day activity? I invite you to share your favorite ideas, too!

Wednesday, August 18, 2010

Tumbling and Wrestling and Roughhousing, Oh My!

Preschoolers Sally and A.J. are ready to engage in some tumble play, also sometimes known as roughhousing or wrestling. The tumbling mat is out and they are in the starting position, on their hands and knees facing each other. Shoes are off and other items are removed -- glasses, name tags, belts, jewelry or other impinging articles. We have gone over the rules for this kind of contact play:

1. No hitting
2. No kicking
3. No biting
4. No pinching
5. No choking
6. No hair pulling
7. Respect one's face, eyes and other sensitive parts of the body

At the signal, ringing of the triangle or bell, the action begins as Sally and A.J. tumble and wrestle each other. When one of the pair is off the mat, the action ceases. It’s now time for another pair of children to take their places on the mat, facing each other on their hands and knees.

“Roughhousing,” as we called it, was always a positive part of my preschool curriculum. On those days when we were pent up inside due to inclement weather or when there was a buzz of high energy in the room, I would take out the tumbling mat, place it in the middle of the circle time rug or carpet, and announce that it was time for roughhousing.


Children who wanted to participate would sit around the edge of the mat and talk with their friends who had joined them about who was going to wrestle with whom (participation was voluntary and children could pick their own partners). An adult was always present. We would go over the rules and demonstrate the difference between a hit or punch, with a closed fist, and a soft push with an open palm or soft shove with a shoulder. There is a world of difference and it is necessary to illustrate it.

Usually, I would ask one of the children or one of my colleagues to demonstrate with me so that I could visually show the group what is acceptable and what is not appropriate behavior.
The children would pick a partner, usually someone who matched their own weight and height, and those two would take their place on each half of the mat. I always had the children start on the ground at the same level.

If you feel an activity like this might be appropriate for the children in your care or classroom, it's important to note that play that involves tumbling and roughhousing is meant to be active and fun for both participants, not a time to knock each other down or intentionally hurt each other. There are differences between aggression (hostile, injurious or destructive behavior) and roughhousing (rowdy, uproarious play or behavior). When aggressive, children frown and fixate on hurting the other child. In rough and tumble play, children willingly participate while smiling and laughing. At the ring of the bell they begin and at the next ring they end (when one of the children is off the mat). The entire “match” lasts between 30 - 90 seconds. The children return to their places around the edge of the mat, ready to wrestle with another friend. After 15-20 minutes, we would be done and the mat was put away.

Children who learn the difference between play wrestling/tumbling and aggressive fighting also develop important social skills. It can, over time, improve a child’s ability to solve problems that arise in social situations -- the give-and-take mimics successful social conversations and interactions. Physically, children are benefiting from the intense physical exertion of rough and tumble play which supports cardiovascular health. Tumbling and wrestling can also help develop gross motor coordination, spatial orientation, directionality, laterality, body image, visual motor control, body awareness and eye hand coordination. After active play such as wrestling/tumbling, children are much more able to sit still and concentrate because they’ve been able to participate in some physical activity.

Many boys and girls enjoy the experience of the big-body play that tumbling/wrestling offers. The preschool period is a critical period for children to develop both physically and emotionally. Tumbling and wrestling for preschoolers can indeed be developmentally appropriate and if you feel it can be appropriate for your youngsters, I encourage you to give it a try!

Thursday, August 5, 2010

Want To Have Fun? STOMP ON IT!

I’ve been using a stomp board (also known as a launch board) for over 25 years! It is a must-have, and one of the kids' all time favorite item for active play! I’ve used it in the classroom as well as at children’s birthday parties and citywide children’s festivals. I use them in obstacle courses inside (on carpet or linoleum) or outside (on cement, grass, etc.) As far as I’m concerned, every classroom could use at least two stomp boards! Discount School Supply carries one called the Joey Jump. In my opinion it really is superior compared to the wood ones I’ve used in the past. The Joey Jump is lightweight, plastic, comes with two bean bags and can be used by both preschoolers and school-age children.

The board is designed for a stomp—forceful step with one foot (not an actual jump)-- on the short end, propelling into the air a soft object (i.e. bean bag) was placed on the other end. The child then tries to catch the object that was launched off the board when they stomped. Because of the design and incline of the board, the object does not go shooting off randomly but propels straight up off the board and the child with outstretched arms can try to catch it in his/her hands.

Children must concentrate on getting their hands ready to catch the beanbag and focus on watching the beanbag as it moves through the air. Children should first focus on attempting to catch the beanbag with both hands at the same time, then try with the right and the left hand alone. As children get better at catching, other challenges can be added such as: stomping more firmly on the board so the beanbag goes higher; attempting to catch two beanbags at the same time; and launching and catching other items such as a foam ball, fleece ball, sensory ball and even a small stuffed animal.

I also like using foam dice with the stomp boards. Kids can put the die on the end, stomp and launch the die. Ask the child what number is facing up when he/she catches it. When using dice, we are not only working on the fundamental motor skill of catching but also addressing the core standard of mathematics--number concepts, counting and geometry (the die is a cube). The stomp board promotes physical development with the use of eye-hand coordination, eye-foot coordination, gross/fine motor skills, and it promotes social/emotional development: self-confidence and independence.

Kids love to do the stomp board over and over again as they try to catch the bean bag or sensory ball. It does take them a couple of times to get the hang of it, but once they do—they are self-motivated to experience THE FUN over and over again!

Thursday, July 22, 2010

Animal Moves

Adapted from TeacherQuickSource, this activity is a great one for helping young children work on gross motor skills and to get them up and moving. This activity can be done indoors or outside, and is great for any size group. "Animals" can be big, small, real and imaginary. They can go on a parade, have a dance or take a wild romp through "the wilderness." The creative possibilities with this activity are as large as the animal kingdom itself!

Goal: To introduce or enhance balance and control during locomotor activities.


Materials needed: Pictures, drawings or video of animals


Let's Get Started:

1. Show the children one of the animal pictures.
2. Discuss the sounds and movements of that animal.
3. Have the children move around the space pretending to be that animal.
4. Repeat the activity with a different animal.

Thursday, July 8, 2010

Summer Brings...

Summer Brings...

Picnics and watermelon,
Bike rides and ice cream,
Friends and family,
Camping and s’mores,
Swinging and cool breezes,
Swimming and fishing,
Bugs and butterflies,
Summer fairs and carnivals,
Sunshine and gardens,
Birds and beaches,
Sand and water,
AND PLAYING OUTDOORS!

I do hope you and the kids are going outside as much as you can... If even only on the playground or in the backyard. Field trips and neighborhood walks can be difficult to conduct these days, but that doesn’t mean that you and the children can’t have lots and lots and lots of outdoor play. Did I say LOTS?! Open the door and explore outdoors. Nature abounds even on asphalt playgrounds.

Bikes, trikes and wheel toys promote gross motor development and lots of dramatic play. Just listen to the cyclists as they speed around on the bike path. Using some props, set up a gas station, car wash, or service station. Socialization, language development as well as physical activity are many of the benefits.

Want more ideas for dramatic play that can take place outdoors?

Gardening can also be a fun summer activity for kids. No space for a garden? Did you know you can plant seeds and grow vegetables in old tires, in giant pots, window boxes or a raised garden bed? Raised garden beds can help protect young or more fragile plants from active preschooler play. Choose plants and veggies for species diversity, various colors, different heights, textures and fragrances. Have the kids help plant and care for them. Or, you may want to purchase a simple greenhouse. Greenhouses provide a great opportunity for children to grow their own food and work with plants throughout the year.

Can’t get to the beach? Turn on the garden sprinkler or fill up the wading pools. Set up the sand and water table to include items to enhance digging, pouring, constructing, and dramatic play with sand and water. Kids love to explore sand and water with funnels, sifters, pails, molds, shovels, rakes, scoops, spoons, cups and saucers, sand wheels, trucks, plastic animals and even craft sticks. Children may want to add natural objects such as shells, sticks, stones or leaves. Fill your sensory table with only water and children will want to make bubbles, wash dishes or give the baby doll a bath.

Fresh air, open spaces and a little imagination and creativity... That's all it takes to make time each day to be outdoors with the children, exploring, making discoveries and appreciating nature this summer season.

Thursday, June 24, 2010

Ready, Set... RUN!

It’s official: This week marked the beginning of summer! Summertime means more time for outside play, and when children go outside they naturally want to move—and not just move, but run and run! Running is a fundamental motor skill that helps children move from one place to another. Once children learn how to crawl, creep and walk, running naturally follows in the developmental order of learning locomotor skills. And when children discover that they can run, they usually can’t get enough of it.

Running’s benefits include the promotion of gross motor skills, vigorous physical activity, and the development of the components of health-related physical fitness--muscular strength and endurance, flexibility and cardiovascular endurance. Here are some activities that will get you off to a running start in helping children in your classroom or home to master movement:

Run Like the Wind
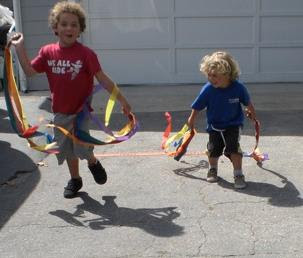
Set up boundaries using ropes or the Start to Finish Lines 15’-24’ apart. Have children run from one line or boundary to another holding a crepe paper streamer, scarf or Rainbow Dancing Wrist Band. They will automatically return to the start line and ask to do it again and again!

Flying Paper Plates & Newspapers
Set up boundaries using ropes or the Start to Finish lines 15’-24’ apart. Have children place a paper plates or sheet of newsprint (9” x 12”) or newspaper (11” x 12”) on their chest and start running. As they run faster and faster they will discover that the newspaper or plate will stick to their chest... a lesson in science, too! Another option is to put a paper plates on the palm of each hand and start running to see what happens.

Run & Roll
Set up boundaries using ropes or the Start to Finish lines 15’-24’ apart. Place a tumbling mat or playmat a few feet in front of the finish line. When you say, “Get ready, get set, run,” the child at the “start line” runs to the mat and falls, rolls or tumbles to a stop. Without even directing children to the start of the running course, they will be in line just panting and waiting for another turn to “Run and Roll.”

Non-Competitive Red Rover, Red Rover
Set up boundaries using ropes or the Start to Finish lines 15’-24’ apart. Two people at the finish line hold a sheet of newspaper (~ 22” x 24”) with two hands on each corner. When you say, “Get ready, get set, run,” the child at the “start line” (with the palms of his hands touching and pointing forward) runs and bursts through the newspaper!

Tails
Set up boundaries using ropes or cones in the available space. Each child tucks a scarf or Rainbow Dancing Wrist Band ribbon into their waistband behind their back. The scarf or ribbon is now their “tail.” The game starts when the music starts and the children run in the available space. The game is played like tag, but instead of tagging each other, children pull the scarves or ribbons out of others’ waistbands and drop them on the ground. The child whose scarf or ribbon is pulled, picks up his scarf (tail), goes to “the tail repair area” (a designated spot, such as a classroom door, tree, etc.) to replace the scarf in their waistband. Once the scarf is secure in their waistband, the child returns to the game and resumes pulling “tails.” The game ends when the music stops. This group game promotes cooperative play, vigorous physical activity and offers lots of laughter!

Thursday, June 10, 2010

Play It Safe!

The National Safety Council has designated June as National Safety Month.

It is the responsibility of adults who care for and teach young children to ensure that outdoor and indoor play areas and equipment are safe and free from danger. The fact that children are attempting new physical challenges makes it impossible to eliminate all risks, but much can be done to the environment itself to reduce the number of injuries. Here are some tips to safer play this summer:
  • In the Heat: Games and activities played in the heat should be shortened and more frequent water/hydration breaks should be instituted. On both sunny and cloudy days use a sunscreen with an SPF of 15 or greater that protects against UVB and UVA rays.

  • Movement: Remove hoods or drawstrings than can get caught on equipment and have all children run in the same direction so they don’t run into each other. Most young children are not yet skilled in dodging objects while running.

  • Safe Stops: Teachers should not ask children to run to a wall or fence or any other immovable object. Most young children cannot yet judge distances or stop quickly. Some children may be likely to run full speed into the wall. Place a tumbling mat or playmat several feet in front of any wall or other immovable object. This gives children a great place to fall, roll or tumble as they stop.

  • Jumping: Children should not jump from distances that are more than half their height. Teachers may instruct, "You can jump off everything that is lower than 4 feet tall," as they let the children help find and measure structures and places that are safe and appropriate jumping places. Teach children how to land softly on two feet when jumping by bending their knees. Show children how to break falls by putting their arms in front of their bodies.
  • Equipment: The indoor and outdoor play equipment should suit the children’s ages and developmental abilities. Children will not usually climb up a structure or piece of equipment if they think they cannot not get down on their own initiative. If they do, teachers may choose not “rescue” children by lifting them off of the piece of equipment or climbing structure, as rescuing may encourage the behavior. Ask them to go back down the way they came up or direct them to a safe place to descend. Of course, an adult would remain present to coach the child patiently down by helping the child anticipate the surface below.

  • Climbing: Did you know that when you lift young children up to a piece of equipment (i.e. monkey bars, etc.) they often do not yet have the cognitive connections to internalize that they are not moving across the monkey bars with their own body and upper arm strength? Many unfortunate “playground accidents” happen when children think they can accomplish a movement task on their own. Limit the number of children using a climbing structure at the same time. For example, learning to wait on the ground before ascending the ladder to a slide gives the child in front of them time to begin sliding or to come back down the ladder. It also eliminates opportunities for horseplay at the top of the slide.

  • Playground Regulations: The playground should have safety-tested mats or loose-fill materials (shredded rubber, sand, wood chips, or bark) maintained to a depth of 12 inches. This type of surface absorbs the impact of a jump or fall. The protective surface should be installed at least 6 feet in all directions from the equipment. Swings require 16 feet of clear area in front and behind with 6 feet free on each side. Equipment should be carefully maintained. Open “s” hooks or protruding bolt ends can be hazardous. Make sure children cannot reach any moving parts that might pinch or trap any body part. All indoor climbing structures should be surrounded by a mat at least 2 inches thick and 3 feet wide. Place these structures at least 4 feet away from walls, doors and other solid structures. Teach children how to climb and maneuver on large structures.

  • Riding: Children should wear trike helmets when riding wheel toys and trikes. When purchasing a helmet, look for a label or sticker that says the helmet meets the CPSC safety standard.

Watch the children at all times during physical activities. Adults should position themselves near the most populated pieces of equipment. Teach young children the rules of safety and watch children for safe and appropriate behavior. Notice changes in a child’s activity level that might indicate a health issue.

Use your own good judgment in anticipating and preventing anything that might be unsafe for the children. Balance fun and safety in children’s play!

Wednesday, May 26, 2010

Why Play Musical Chairs When You Can Play Musical Hoops?

Have you ever watched children play Musical Chairs? When the music stops, the kids push and shove to get to a chair. The first child who doesn’t find a seat sits out of the game, all alone. As the game continues, the kids can get more and more aggressive, stopping at nothing to be the winner. In the meantime, the losers may feel left out, bored or upset. This game is an example of a competitive game. Young children feeling left out is one of the reasons I like to recommend cooperative games for early learning, where every child is a winner.

Competitive games can pit children against each other; during active games children may learn that, if you shove, push, hit or trip, you might gain advantage over the other players and win. Competitive games with just one winner means a whole group of losers. Young children generally play games to have fun and be involved; they don’t want to be quickly eliminated, rejected, left out, hurt physically or emotionally. (Who does?!)

Cooperative games include everyone. Every child is allowed to stay involved, there’s no pressure to win, no fear or anxiety about losing. Musical Hoops is a cooperative game for young children that helps promote self-esteem, sharing, kindness and teamwork as well as develops spatial awareness, gross motor skills and listening.

Musical Hoops

Materials Needed:
One hoop per child
Music/CD player and CD

How to play:
1. Scatter hoops in available space either indoors or outdoors.
2. Each child stands beside a hoop.
3. Start the music and instruct the children to walk around the hoops, making sure not to touch them while the music is playing.
4. When the music stops, each child steps into the nearest hoop. Tell them that it’s fine if more than one child ends up in one hoop. In fact, encourage it!
5. Start the music again and remove a hoop or two. When the music stops, the children step into the nearest hoop.
6. The game continues with you starting and stopping the music, gathering up more hoops and the children scrambling to all fit into the remaining hoops.
7. Musical Hoops ends with one or two hoops on the floor and all of the children working together to make sure everyone finds a place inside a hoop (even if it’s just one foot inside the hoop). It’s crowded but lots of fun!

Furthermore:
• Vary the locomotor skill children use to move around the hoop each time you restart the music. Ask the children to jump, gallop, skip, march or walk on tiptoes.
• When the music stops and children stand in the hoops, ask them to count and/or show with their fingers the total number of people in their hoop.

Thursday, May 13, 2010

Trike Traffic Town

May is National Bike Month. A fun way to celebrate with young children is to go outside and set up a Trike Traffic Town course on the blacktop or concrete using cones, traffic signs, chalk road markers, directional arrows and children on trikes, scooters or any favorite wheeled toy. (Don’t forget to provide each child with a properly fitted child-size or toddler-size helmet.) This activity also provides a perfect time to reinforce bike safety and the “rules of the road” on your playground.

Before children attempt pedaling through Traffic Town, teachers should ask them to stand shoulder-to-shoulder on the side of the course and watch as you direct one child in demonstrating the how-to’s of the course. Verbally describe directions for each part of the course, i.e., “ride around the cones,” etc.

Next, line up the first riders on their trikes, at the start of the course and tell them to follow the leader, while you guide them safely through the course. Emphasize that Traffic Town is not a race and they should not speed through the activities. Stress to the children to keep some space between them. If a traffic jam does occur, tell the children to please wait patiently and not to rush their fellow trike riders.

Materials Needed:
10 Colored cones
6 Cones with Holes,
6 Traffic Signs,
Arrow Spots
2 Nylon Jump Ropes
Bubble Wrap or Textured Packing Material
Sidewalk Chalk

Traffic Town Course

1. Put the GO Traffic Signs, in the hole in top of a cone. Children on trikes begin here. Teachers may want to stagger the starting time of each child.

2. Put ONE WAY Traffic Signs, in hole in top of a cone. Place the 6 Colored Cones about 4-6 feet apart from each other. Using Sidewalk Chalk, make directional arrows around the cones to make a zigzag slalom course. Following the arrows, the trike riders zigzag from the right of one cone to the left of the next, and so on until they complete the 6 cone slalom course.
3. Place 2 ropes horizontally on the ground, parallel to each other and 2-3 feet apart to create a crosswalk. Put the yellow School Crossing Sign in the hole in top of a cone. Set it in front and to one side of the ropes. The trike riders continue traveling but must stop and wait for “pedestrians to cross” (other children or parents/teachers.) If no one is in the crosswalk, riders can proceed forward over the ropes.

4. Place several long strips of bubble wrap on ground. Put the yellow SLOW Sign in the hole in the top of a cone. Set it in front and to one side of the bubble wrap. Tell children that there is “Roadwork in progress. It’s a bumpy road,” as they drive their vehicles over the bubble wrap.

5. Set up 4 colored cones side by side horizontally in the middle of the traffic town. Put the DO NOT ENTER Sign in the hole in top of a cone, and place it in front of the 4 cones. (Tell the children that “The road is blocked! It looks like there was a rock slide!”) Place the Arrow Spots on the ground in front and to the side of the cones, indicating the direction the drivers must turn to maneuver their trikes around the blocked roadway.

6. Put the STOP Sign in the hole in top of a cone. Here. “We’ve come to the end of Traffic Town. Let’s do it again!” Using the remainder of the Arrow Spots, direct trike riders back to the beginning of the course.

Children will want to repeat traveling this popular roadway over and over again. Be alert to children traveling too fast and not being able to manage the curves safely. Children at this young age are figuring out what their muscles can and cannot do.

This activity promotes...

  • Gross motor development (using the large muscles of the legs and arms)
  • Visual discrimination (ability to recognize the traffic signs and arrows to follow directions)
  • Bilateral coordination (using legs to pedal the trike and arms to steer the trike)
  • Spatial awareness (children moving in the space with other children on trikes)
  • Traffic Town also fosters cooperative play and turn taking as well as dramatic play while preschoolers pretend to be “drivers” and following the road.

    Thursday, April 29, 2010

    Ducking Out of Duck, Duck Goose

    The rules to play the traditional children’s game of Duck, Duck, Goose are generally that all players except "IT" sits in a circle. IT (sometimes called the "goose") walks around the outside of the circle, behind the players’ backs while tapping gently on each of the seated players’ heads, saying “Duck...Duck...Duck...” each time they tap a head. When IT taps a player's head and says, “Goose!” the new "goose" jumps up and chases the first child around the circle. If the new goose doesn’t tag the other child before s/he reaches the open seat in the circle, IT takes the place in the circle and the new goose resumes the game by tapping heads. (If the new goose did happen to tag IT, s/he gets back to his/her spot in the circle and the first child remains IT.)

    However, I've noticed sometimes the person who is IT doesn’t just “tap” a child’s head gently, they “hit”! Also, children who don’t want to be “hit” may put their hands on top of their head and lower their heads into their laps. Other children may follow that child’s lead and then there are no heads to “tap,” indicating that no one wants to play the game.

    I want to share with you what I feel is a more developmentally appropriate way for young children to play this game in an early childhood classroom or home setting.

    A Tisket, A Tasket, My Fruit & Veggie Basket
    Materials Needed:
    Small basket filled with plastic fruits and vegetables
    How to play:
    1. Sit young children (players) in a circle.
    2. One child is chosen to hold the fruit basket and walk around the outside of the circle, behind the players’ backs while the group chants:

    A tisket, a tasket,
    My fruit and veggie basket.
    I went walking down the lane,
    And on the way I dropped it,
    I dropped it, I dropped it...

    4. On the last verse, the child walking around the circle drops the basket behind a player’s back.
    5. That player picks up the basket and runs after the first child, who is running back to the open place in the circle.
    6. If unable to tag the player before s/he gets to the open spot, the new player holding the basket must now walk around the outside of the circle, dropping the basket of fruits and veggies behind someone who has not yet had a turn.
    7. The game ends when every player has had a chance to hold and drop the basket.

    Another way to play this game in a similar way is to have the first child hold a small cardboard pizza box and walk around the outside of the circle, behind the players’ backs while the
    group chants:

    Pizza delivery in the box,
    Pizza delivery piping hot,
    Pizza delivery ready or not.
    Ding, dong, PIZZA DELIVERY!


    On the last words, “Pizza Delivery,” the child drops the pizza box behind a players’ back and the game continues per the steps above.

    Preschool children love the element of surprise that these games offer. Whose back is IT going to drop the basket or pizza box behind? They also love to play chase and the activity of running and increasing heart rates is very beneficial for physical health and development.

    These activities are also great for teachers to use when children are in transition -- i.e., waiting for parent pick up or for their group’s turn at the art center in the classroom, etc. Remember young children do not need to engage in competitive games with definite winners and losers. Having fun and playing cooperatively is a great main objective!

    Thursday, April 15, 2010

    Kids on Parade! Rhythm Stick Fun

    Rhythm sticks or clave (klah-vey)—a Latin name for rhythm sticks—are indisputably one of the best first instruments for young children.

    Rhythm sticks are members of the “percussion family” of instruments—which are musical instruments sounded by striking, shaking or scraping—and are tapped together to make a sound. Small percussion instruments are the most appropriate for children ages 2-7 and include the triangle, maracas, bells, tambourines, drums, cymbals and sand blocks.

    Rhythm sticks are a natural extension of the sounds children make with their hands (clapping) and feet (stamping). Basic rhythmic concepts about beat, tempo and patterns are great for teaching to young children and can be experienced through a variety of fun activities, including playing rhythm sticks. When rhythm sticks are used in musical activities for young children, the process, rather than the product, is the important goal. Children thrive on the familiar; they enjoy the security of repetition and it’s an essential component for building basic skills and understanding.

    It is important that rhythm sticks for the 2- and 3-year-olds be the appropriate size. Chunky Rhythm Sticks from Discount School Supply. are specifically made for little hands and fingers to easily grip and hold. This set includes 24 sticks or enough for 12 children with one for each hand.

    Rhythm Stick Play: Objectives/Learning Outcomes
    Playing and using rhythm sticks promotes and develops the following:

    • Small motor development—using the small muscles of the hands and fingers
    • Eye-hand coordination—eyes and hands working together smoothly
    • Dexterity—skill and ease in using hands
    • Eye tracking—eyes being able to follow an object as the object moves in space
    • Directionality—the inner sense and knowledge of where things are in relation to the body
    • Auditory discrimination—being able to hear and identify differences in sounds
    • Listening skills—ability to follow verbal directions
    • Coordination—parts of the body moving smoothly together
    • Rhythm—aspects of music having to do with time; patterns of sound perceived in relationship to a recurring beat
    • Beat—recurrent throb or pulse in music; important rhythmic skill to develop before the age of seven as the ability to keep a steady beat is linked to linguistic development
    • Tempo—the speed of music
    • Thinking processes—creative thinking and problem solving; develops memory (pattern and sequence)
    • Crossing the midline—occurs when left or right arms or legs cross over the center of one’s body and promotes communication between the brain hemispheres


    Rhythm Stick Play: Rules
    It is helpful to establish rules that will make the playing experience a happy and enjoyable one for both adults and children. As the teacher or leader of the activity, do not pass out the rhythm sticks until you have made clear what your expectations are regarding use of the rhythm sticks. The teacher or leader should demonstrate the activity first. If a child does not use his or her sticks properly or safely, an appropriate consequence might be to take them away for a short period of time, allowing that child to observe and rejoin when he/she feels able to follow the rules.
    The following are some suggested rules and ideas for classroom and home activities using rhythm sticks:
    1. Children sit cross-legged in a scattered or circle formation, ensuring that each child has his or her own personal space.
    2. An adult or class helper is the keeper of the bin of sticks and walks around the group to allow each child to pick two sticks.
    3. Rhythm sticks are passed out and children lay them on the ground in front of them and put their hands in their lap.
    4. Upon teacher or leader instructions, or when the music starts, children can pick up their sticks and follow your lead.
    5. When the music stops or the teacher says “freeze” and all activity ceases. If children are sitting, the sticks go back on the ground and hands go in their laps.
    6. For organized clean up, an adult or class helper brings the bin around and instructs the children to put the rhythm sticks in the bin.

    Rhythm Stick Play: Activity Idea
    Pass out the rhythm sticks—, have children practice following a leader as they keep time to the music. Ask the children to stand up and get ready to march (a precise type of walk, accompanied by lifted knees and swinging arms) in the rhythm stick band! The teacher or a child can be the leader of the parade who marches in front, setting the direction and pace of the parade. Select a musical selection with a short, regular beat for a melodic and rhythmic background to accompany the sticks.

    Thursday, March 11, 2010

    Parachute Play!

    Open it up, spread it out and the kids will come running! A parachute or play canopy is big, colorful and inviting. In preschool classes and teacher trainings, I’ve been sharing games and activities that promote gross motor skills, physical activity, lots of smiles and tons of fun. Here are some parachute activity ideas you may want to try with your own children or the children in your classroom:

    Brave the Waves and Pop the Bubbles
    While sitting down around the outside edge of the parachute, have children grasp the parachute and shake the parachute up and down. Select two or three children to crawl (on hands and knees) on top of the parachute and pop the “bubbles” that are created when everyone moves their hands up and down making “waves.”


    Hi and Hello
    While standing and holding the parachute, ask children to follow your directions with the correct movements: “Touch your toes, ready... lift!” Children lift the parachute up and over their heads. While the parachute is inflated encourage children to greet one another by waving with one hand while saying “Hi or Hello” as the parachute deflates. Repeat the activity, but this time wave with the other hand and to friends on another side of the parachute.


    Mushroom
    While standing and holding the parachute, ask children to “Touch your toes, ready... lift!” When the parachute has reached its apex, instruct children (while still holding parachute) to quickly walk toward the center of the inflated chute and look up at the mushroom cap above them. As the parachute deflates, direct children to walk backwards to their original positions while still holding onto the parachute.


    Dome Camping Tent
    While standing and holding the parachute, ask children to “Touch your toes, ready... lift!” Direct children to walk forward one step while pulling the parachute behind them and sitting down on the edge of the parachute. By sitting down inside the parachute they seal as much air as possible while creating a dome tent.


    Popcorn
    Children stand around the parachute, holding it with an overhand grip. Throw 6 -10 foam balls into the middle of the parachute. Tell the children that it is time to make popcorn. The balls are the kernels of popcorn, and if they shake the parachute hard enough, the corn will start to pop. Designate one child to be the “Popcorn Police” whose job it is to retrieve the kernels (balls) that have flown off the parachute and throw them back onto the parachute. Children keep popping the corn until they are “too pooped to pop.”


    High-5 Exchange
    Children stand around the parachute, holding it with an overhand grip. Ask two children across from each other to let go of the parachute. These two children will exchange places, walking beneath the inflated parachute, while the group lifts the parachute on the teachers' command. As they pass each other under the parachute, they can slap palms with a “High 5” as they go to their new place on the other side of the parachute. Continue playing until everyone has had a turn to exchange places.

    Young children in your classroom or home love to repeat these activities. Remember that they learn best through repetition and experience--and so do you! The more and more you play with the parachute the more confident you will become in using this outstanding piece of equipment as part of your daily physical education or movement activities.

    Thursday, February 11, 2010

    3, 2, 1... Blast Off to Space Academy!

    I had the opportunity this week to see the launch of the Space Shuttle Endeavour from the Kennedy Space Center in Cape Canaveral, Florida. It was the last night launch of the space shuttle program and the sight of it left me awestruck. It was powerful and inspiring!

    I was watching the launch with my two young grandsons. They have always had an interest in the solar system and outer space as many young children do. We talked about the astronauts and the training they received in order to prepare themselves for the rigors of spaceflight.

    We, as caregivers, parents and/or teachers of young children, can build on children’s interest by setting up Space Academy and providing physical challenges for our “young astronauts in training” to complete. Below are the course components of what the “astronauts” are to perform at each station. They are not only fun to do, but they also promote gross motor development, fine motor coordination, eye-hand coordination, eye-foot coordination, balance, spatial awareness, language development, creativity and imagination!

    Blast Off: Designate a “launch pad” with a Hoop or Poly Spot Marker. The “astronaut” assumes a squatting position on the launch pad and begins the countdown chanting loudly and slowly, “10,9,8,7,6,5,4,3,2,1,0...BLAST OFF!” Children “blast off” (stand or jump) from squatting position, arms raised toward the sky.

    Flying Saucer Throw: Hang a Hoop from a tree or a beam and instruct astronauts to throw a “flying saucer” (flying disc) through the hoop.

    Orbiting Planets: Place 4-6 Cones two feet apart from each other. Children hold a Hoop around their waist and “orbit” (circle) around each cone as a planet would around the sun.

    Asteroid Toss: Use Foam Balls or Sensory Balls and plastic Buckets. Astronauts toss the “asteroids” (balls) into the buckets to prevent them from hitting the earth!

    Moon Walk: Set out Pods or Riverstones randomly but not too far apart. Astronauts step on each pod or stone as they walk on the moon’s uneven surface.

    Ride a Moon Rover: Set out Roller Boards and Cones or Hop Around Steps. Astronauts sit on a “moon rover” (Roller Board) and travel around the Cones using their feet.

    Return to Earth: Use a Joey Jump and Bean Bags. Astronauts place bean bag at end of “launch board” (Joey Jump). They step on the opposite end of the board to catapult the “retrorockets” (bean bags) and catch the rocket in their hands--ensuring a safe landing and the completion of another successful Space Shuttle mission.